
Why You Should Customize Your Lightroom Toolbar (And How to Do It)
For Lightroom users looking for a more efficient workflow, there’s a powerful feature that’s often underutilized: customizing the Lightroom toolbar.
While it’s not exactly a secret, many users aren’t aware of how to fully leverage this feature to streamline their workflow and significantly boost their editing speed.
Let’s take a look at how to do it:
Lightroom and Photoshop Facebook Group
How to Customize the Lightroom Toolbar
Adobe has done a great job with Lightroom and Photoshop by allowing users to customize the interface to suit their needs. However, one area that often goes unnoticed is the Lightroom toolbar.
This easily overlooked toolbar changes depending on what you’re doing:
- In the Library module, the toolbar offers different options than in the Develop module.
- Within the Develop module, the toolbar also changes based on the tools you’re using.

1. Locate the Lightroom Toolbar
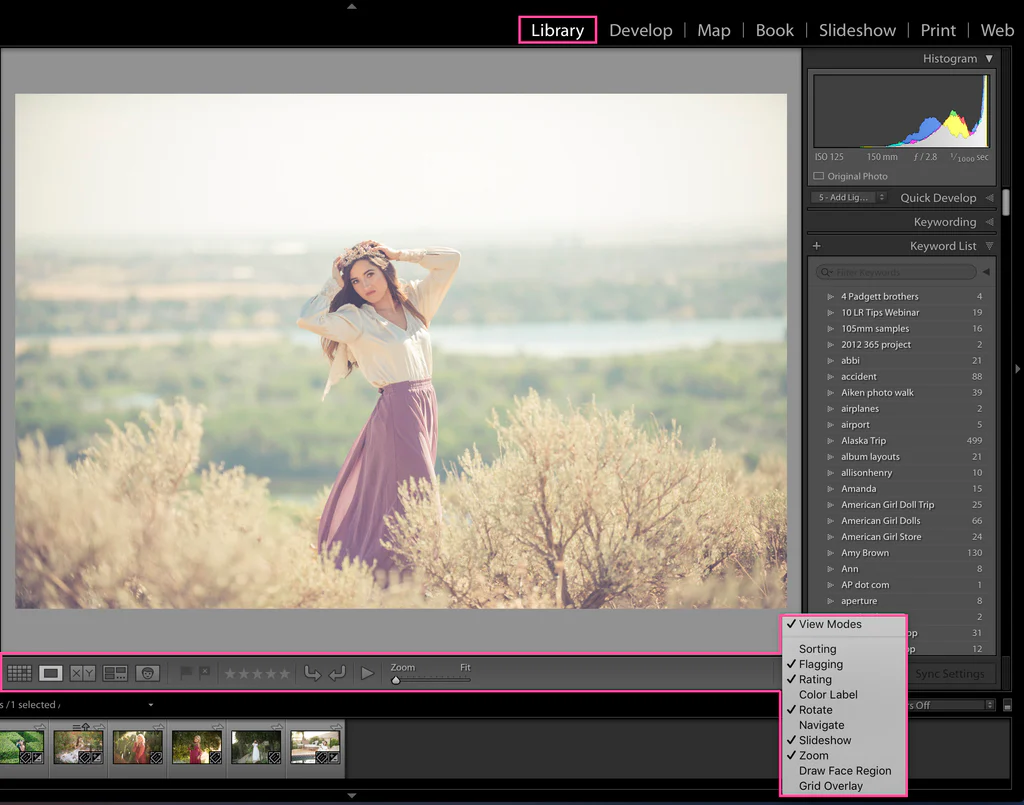
The toolbar is the gray strip below the grid/image view in the Library module or beneath the image in the Develop module. If you don’t see it, press the “T” key on your keyboard to toggle its visibility.

2. Add Frequently Used Tools
Click the small arrow on the far right of the toolbar to open the tools menu. Check the tools you use frequently to add them to your toolbar.

3. Remove Unused Tools
If there are tools in Lightroom you never use, open the same menu and uncheck the ones you want to remove. This will help declutter your workspace and allow you to focus on the essential tools. If you need them later, you can always add them back.