

How to Create a Golden Hour Effect in Lightroom
Golden Hour is well-known among photographers for its warm glow, enchanting highlights, and intensely saturated colors. However, its brief duration often poses a challenge, as photographers have a limited window to take advantage of this incredible lighting. Fortunately, with Adobe Lightroom’s powerful tools, you can recreate this effect at any time.
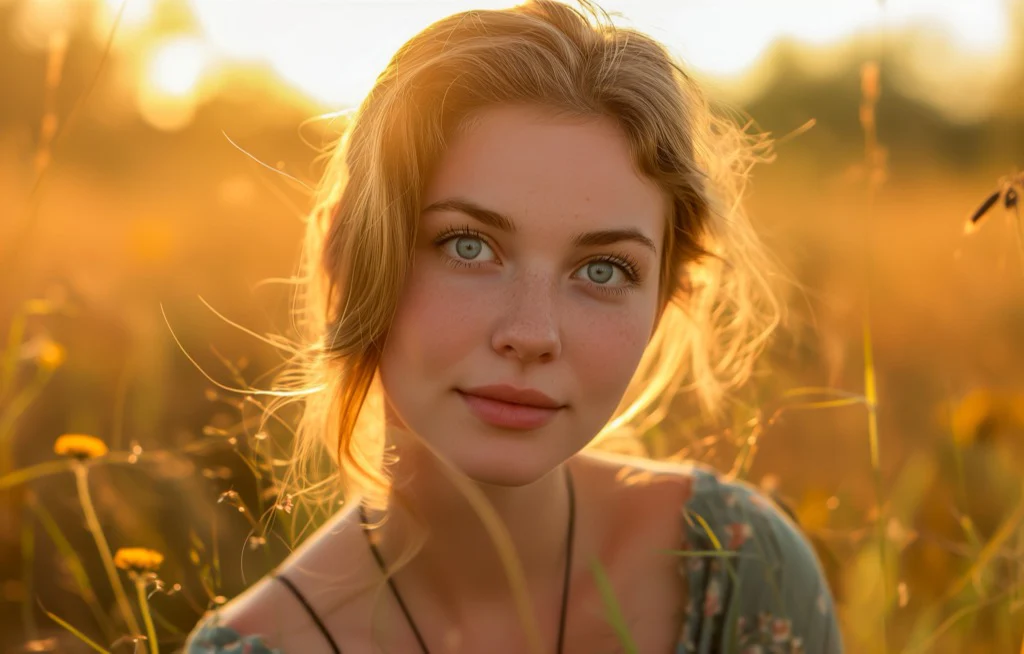
By mastering lighting, color, and effect adjustments in Lightroom, you can transform your photos into stunning images that capture the magic of golden hour light.
In this tutorial, I’ll guide you step by step on how to turn a daytime photo into an image with the subtle yet impactful look of golden hour.
Lightroom and Photoshop Facebook Group
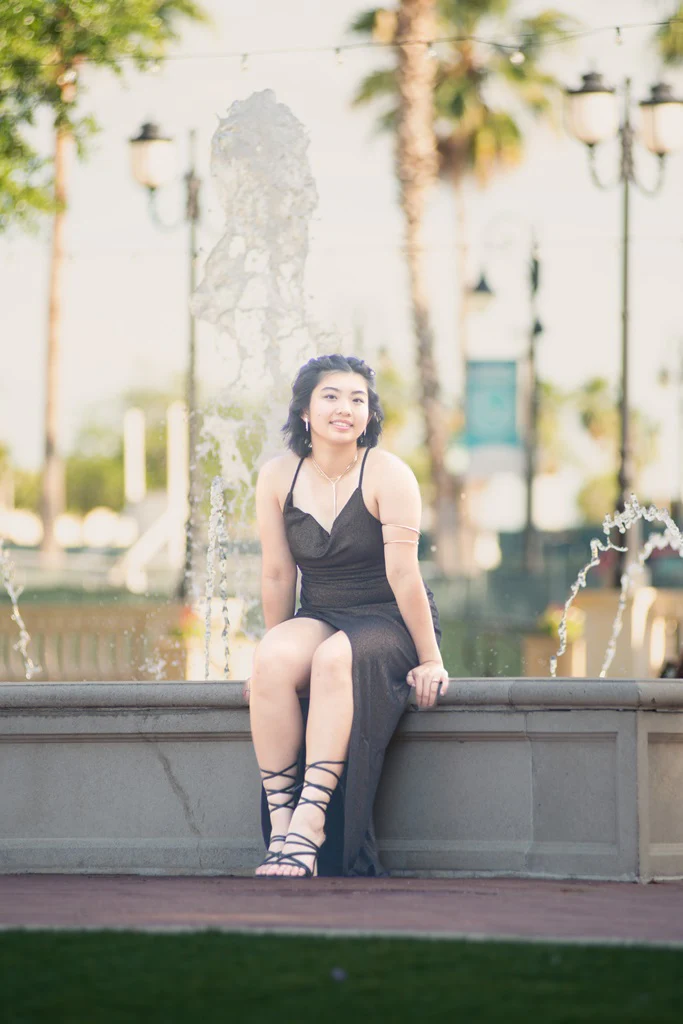
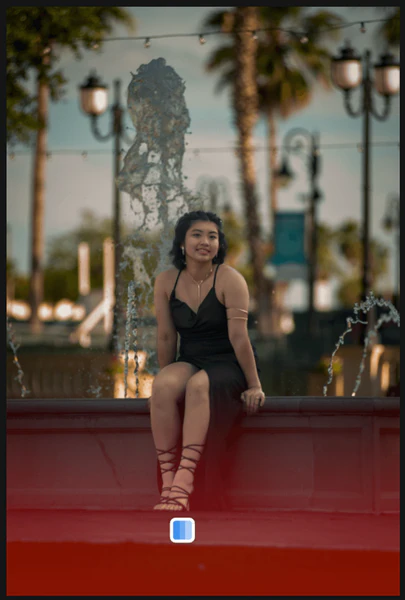
We’ll start with a photo I took of myself in the park, captured during the day, around 4 p.m.:
Golden Hour Edit in Lightroom
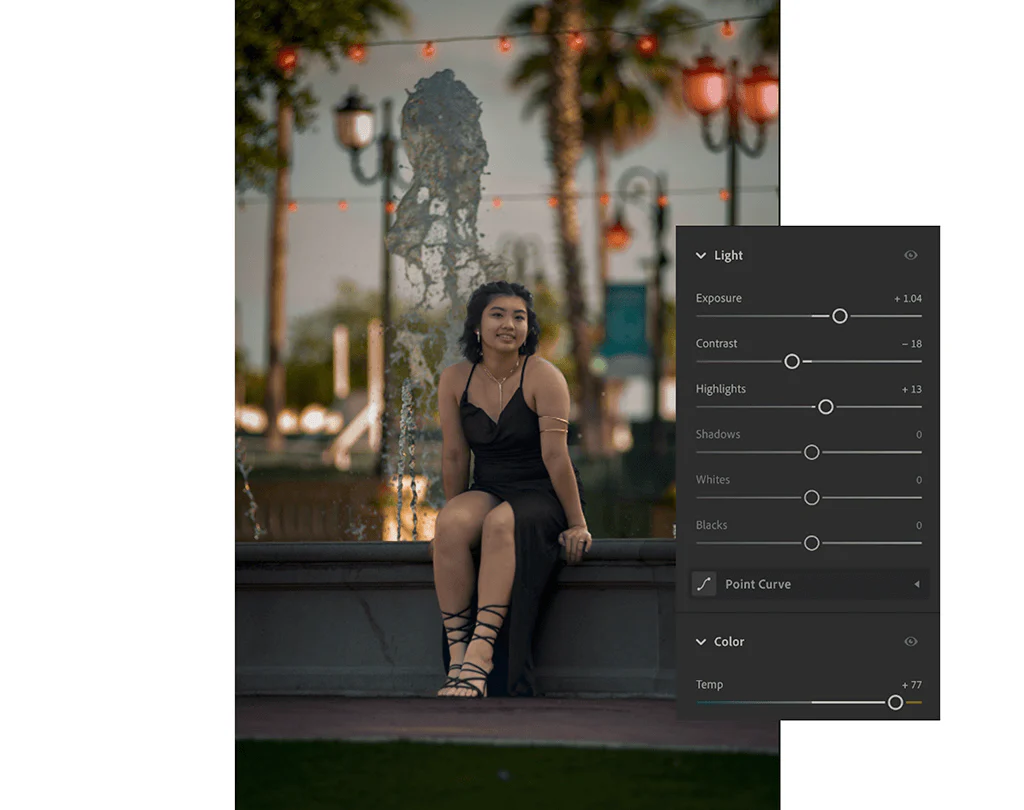
Step 1: Lighting Adjustments
In this image, the sky and background are much brighter than the subject. To balance the exposure, I’ll make selective adjustments using masks.
First, I cropped the image to better center the subject. Then, I applied separate masks for the background and the subject, adjusting the exposure and color for each. To mimic the warmth of golden hour, I increased the background temperature by 15 to 20.
Golden Hour Effect in Lightroom
Next, to adjust the overall lighting, I reduced the exposure and highlights.
Golden Hour in Lightroom I also added a slight S-curve, raising the highlights and darkening the shadows. This will enhance the warm tones and add depth to the image.
Golden Hour Edit in Lightroom
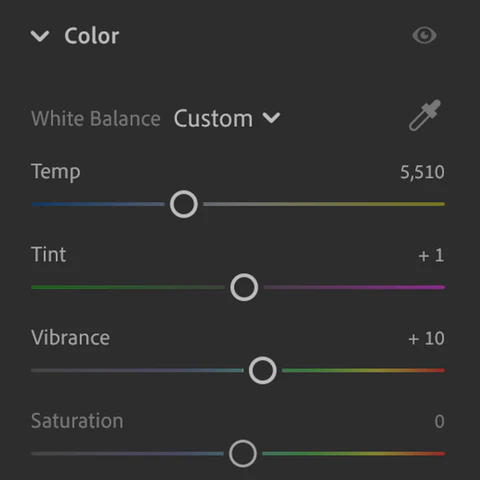
Step 2: Color Adjustments
The goal is to achieve a soft, warm lighting effect. I started by adjusting the white balance to add warmth and increased the vibrance to intensify the colors without oversaturating them.
Golden Hour Tutorial in Lightroom
Next, I intensified the golden tones using HSL (Hue, Saturation, Luminance) adjustments.
In the HSL panel, I increased the saturation and luminance of warm colors like oranges and yellows to make them more vibrant.
Golden Hour Settings in Lightroom
I also increased the saturation of greens and teals to enrich their tones.
How to Create Golden Hour in Lightroom
In the Color Grading panel, I used split toning to manage the colors in the highlights and shadows separately. I added a warm tone (orange or gold) to the highlights and a cool tone (blue) to the shadows, simulating the nuanced light of golden hour.
How to Edit Golden Hour Photos in Lightroom
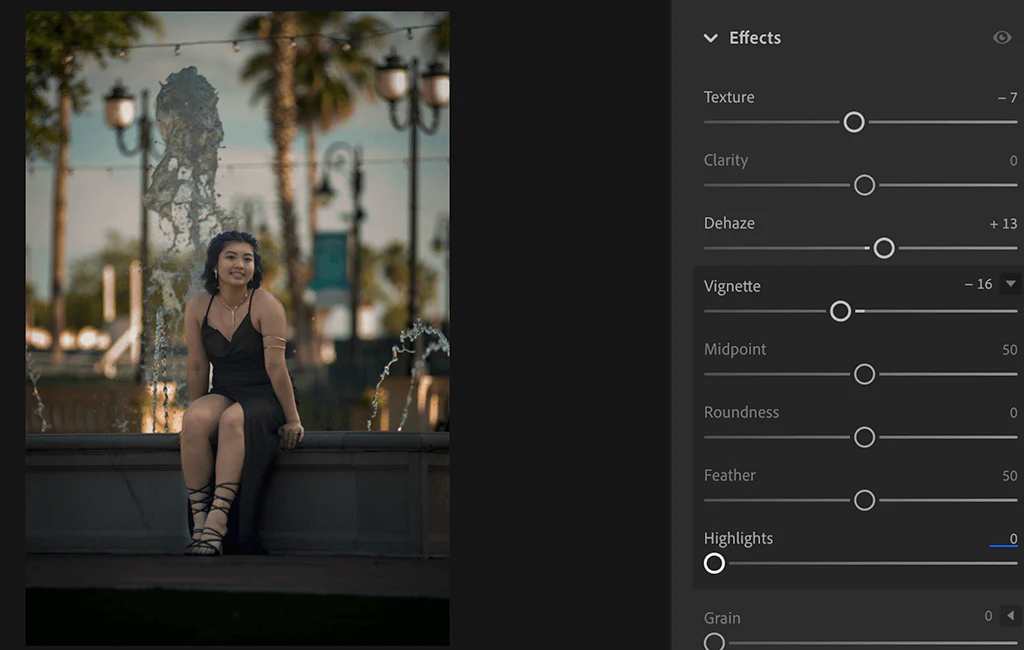
Step 3: Adding Effects
To enhance the image, I increased the dehaze value to reduce the haze present.
I also added a subtle vignette to frame the subject and better direct the viewer’s attention.
How to Fake Golden Hour in Lightroom
Step 4: Detail Adjustments
To refine the image, I adjusted the masks with lighting effects and linear gradients, as well as corrected the sky color.
I added a linear gradient at the bottom of the image to gently guide the viewer’s gaze toward the subject.
Golden Hour in Lightroom
Noticing greenish spots in the sky, I used a selective color mask to balance and even out the tone. After applying the mask, I slightly increased the exposure and highlights while reducing the whites and blacks.
Golden Hour Settings in Lightroom
To correct the greenish tint, I increased the warmth and reduced the vibrance, achieving a more uniform sky.
Golden Hour in Lightroom
Additionally, I created another mask for the entire sky and slightly reduced the highlights, further balancing the overall lighting.
Golden Hour in Lightroom
Step 5: Final Touches
To accentuate the warm glow of golden hour, you can experiment with additional lighting adjustments, such as using radial gradients to direct the light or adding artificial light sources for more depth and warmth. These adjustments can enhance the effect, even under less-than-ideal lighting conditions.
For this image, I wanted to highlight the hanging lights and the streetlight in the background by adding a realistic glow effect to them.
To achieve this, I used two separate masks:
- First mask: To isolate the center of each light and adjust the highlights and color. I increased the exposure, reduced the shadows, and raised the highlights, along with increasing the temperature to make them stand out.
- Second mask: To add a soft, diffused glow or halo around the lights. I applied similar adjustments (increasing exposure and temperature) to simulate the gentle radiance of golden hour.