

Beginner’s Guide to Using Photoshop’s Generative Fill Tool
Photoshop’s Generative Fill tool is a revolutionary AI-powered feature that effortlessly expands images, enhances details, and transforms photos.
In this guide, we’ll show you how to use this tool to extend an image—starting with one side and then expanding both sides simultaneously. We’ll also use the Remove Tool (another AI-powered Photoshop feature) to fix imperfections.

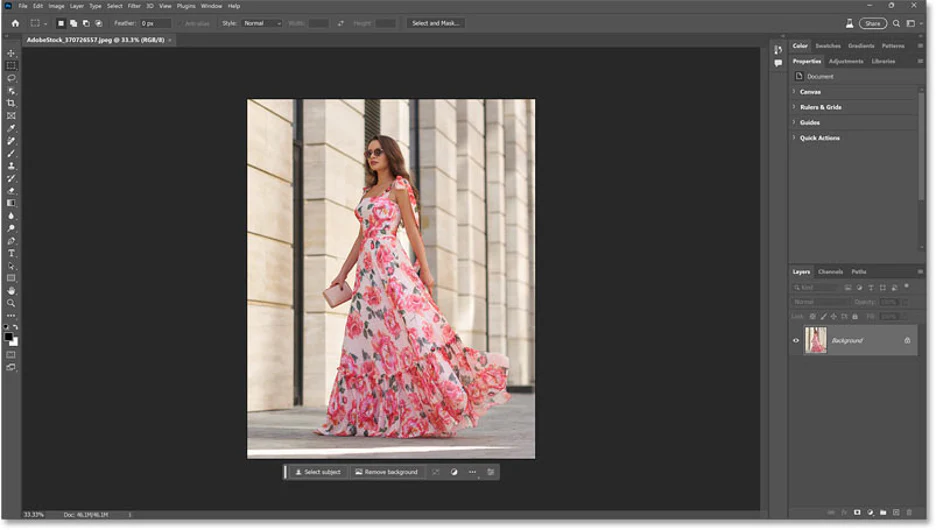
Whether you’re working with your own images or Adobe Stock samples (like the one in this tutorial), this guide will help you expand photos realistically and professionally.
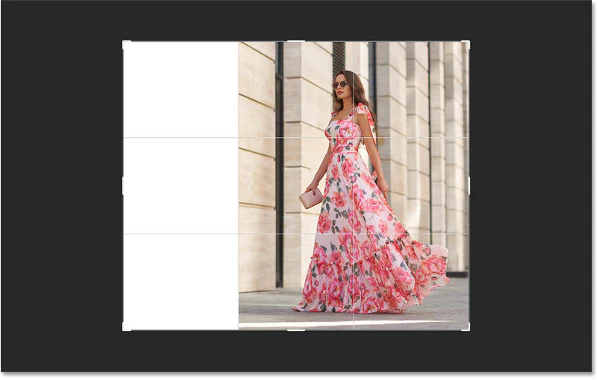
Step 1: Use the Crop Tool to Expand the Canvas
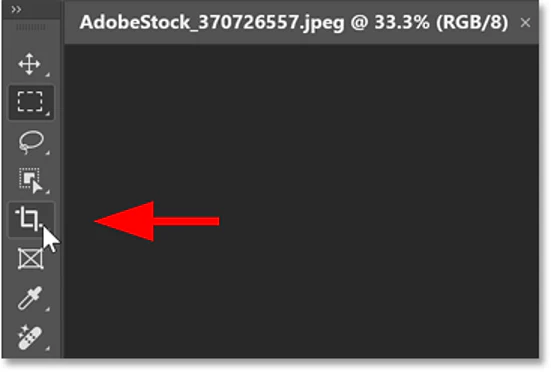
- Select the Crop Tool from the toolbar or press C on your keyboard.
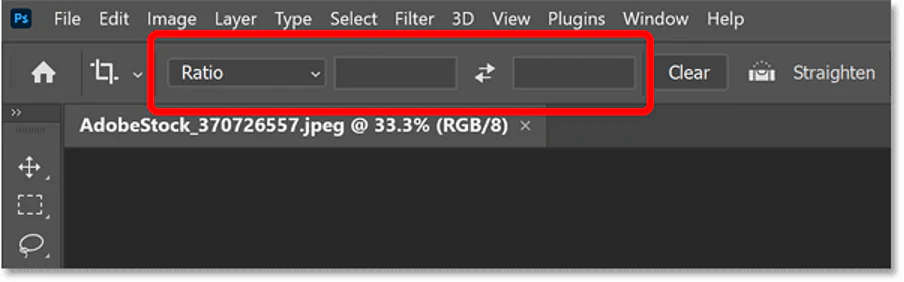
- In the Options Bar, set Aspect Ratio to “Ratio”.
- Leave the Width and Height fields blank to freely expand the canvas.
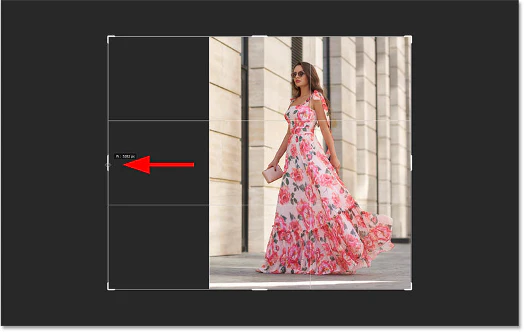
- Drag the crop border outward to the side you want to expand (left or right).
- Press Enter (or Return on Mac) to confirm.
💡 Tip: The expanded area will appear with your background color (usually white).
Step 2: Select the Expanded Area with the Rectangular Marquee Tool
- Press M to select the Rectangular Marquee Tool.
- Draw a selection around the expanded area.
- Make sure the selection slightly overlaps the original image so Generative Fill blends seamlessly.
Step 3: Use Generative Fill to Expand with AI
- Click “Generate” in the Contextual Task Bar (if you don’t see it, go to Window > Contextual Task Bar).
- Leave the text field blank to let Photoshop generate content automatically.
- Click Generate again.
💡 Processing takes 10-15 seconds (Photoshop sends data to Adobe’s AI servers).
Step 4: Choose from 3 AI-Generated Options
Once complete, Photoshop will display 3 variations in the Properties Panel.
✅ Click each thumbnail to preview and pick the best one. ✅ If none work, click “Generate” again for new options.
Step 5: Refine Imperfections with the Remove Tool
If AI creates odd artifacts (like strange shadows or objects), use the Remove Tool:
- Create a new layer above the Generative Layer (to avoid editing the original).
- Select the Remove Tool (grouped with the Spot Healing Brush).
- Adjust brush size ([ ]) and paint over unwanted areas.
- Photoshop automatically fills the removed spots realistically.
Summary
✅ Expand images realistically with Generative Fill. ✅ Pick the best AI-generated version from multiple options. ✅ Fix imperfections with the Remove Tool.
Try this tool to add space to your photos or create limitless surreal images! 🚀
📌 Download Photoshop Beta (requires Creative Cloud) to use this feature for free.