

How to Edit Night Sky Photos in Lightroom
Night sky photography is one of the most challenging yet rewarding aspects of photography. The thrill of seeking out dark skies and breathtaking landscapes to capture the Milky Way on a clear, moonless night attracts both amateur and professional photographers worldwide.
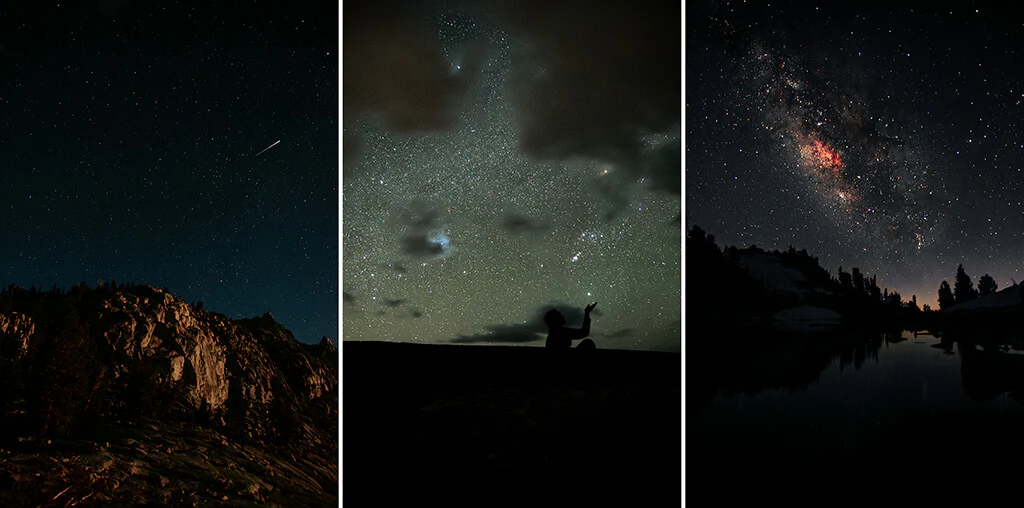
For those of us without expensive star-tracking equipment or specialized filters, post-processing plays a crucial role in revealing the beauty of the night sky. Even professional photographers often enhance their images to achieve those iconic, colorful and luminous shots we admire on Instagram.
This guide will walk you through the process of editing night sky photos using Lightroom’s powerful tools – a workflow I’m particularly passionate about and excited to share with you!
Lightroom & Photoshop Facebook Group
Starting Image
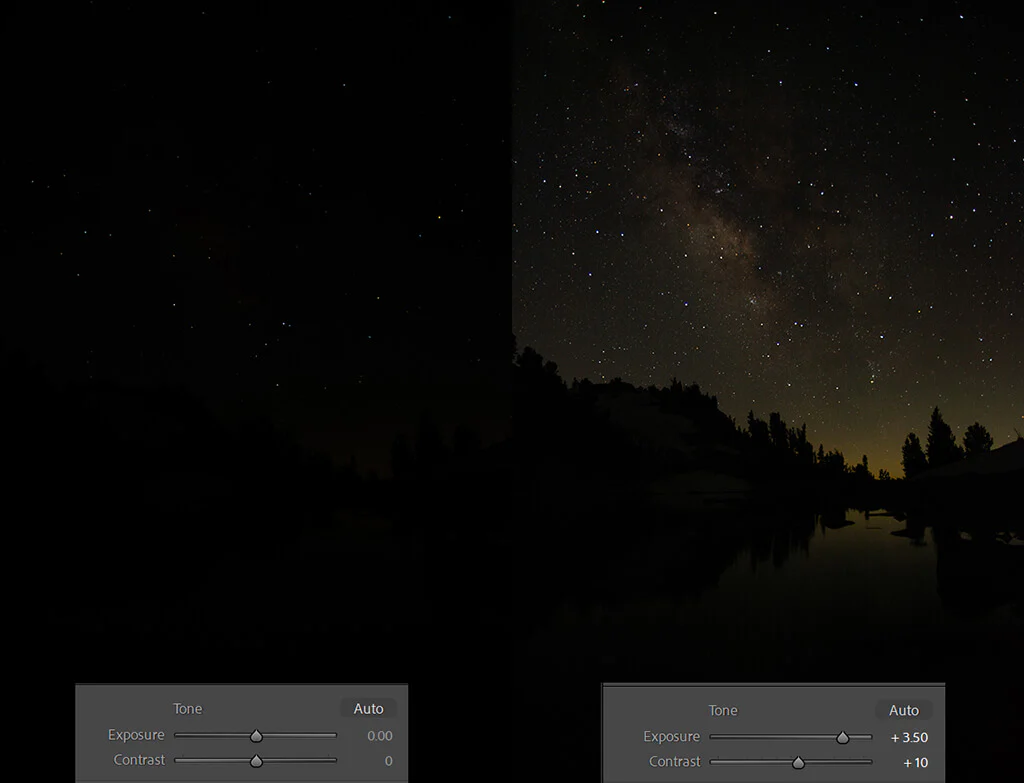
Let’s begin with this severely underexposed Milky Way photo I captured during a backpacking trip in the Sierra Nevada. While it appears almost completely black now, just wait to see how Lightroom transforms it!
Step 1: Exposure and Clarity Adjustments
When photographing stars, exposure time should be limited to about 20 seconds to prevent star trails. Combined with low ISO to reduce noise, this often results in dark images – but don’t worry, all that beautiful color data is still there waiting to be revealed!
Basic Adjustments:
- Exposure: +3.50 (compensates for initial underexposure)
- Highlights: +70 (accentuates the brightest stars)
- Whites: +21 (enhances stellar contrast)
- Shadows: +15 (recovers landscape details)
- Blacks: -4 (deepens silhouette effect)
Dehaze and Clarity:
- Dehaze: +51 (reduces light pollution and reveals hidden stars)
- Clarity: +62 (sharpens star details)
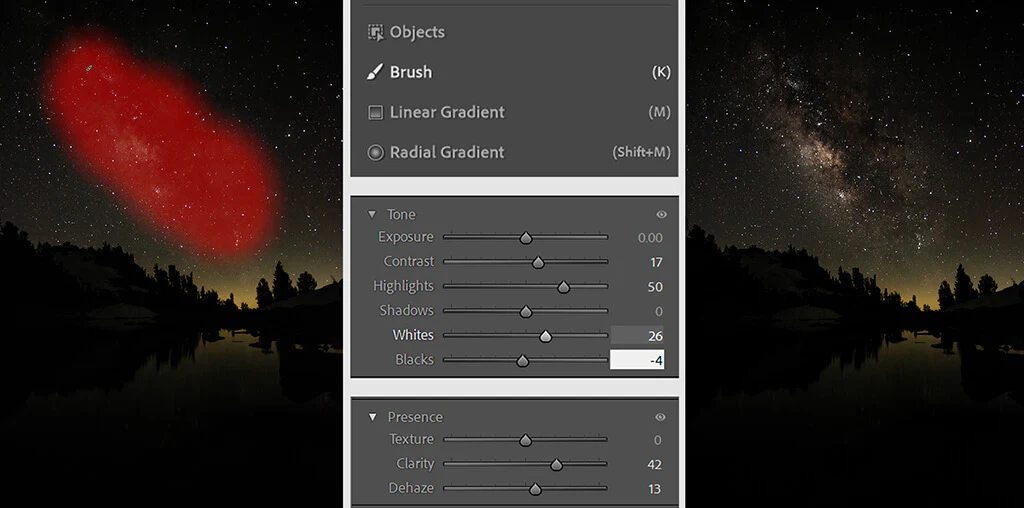
Step 2: Masking the Milky Way Core
Use the Adjustment Brush to isolate the galactic center:
- Contrast: +17
- Highlights: +50
- Whites: +26
- Clarity: +42
- Dehaze: +13
- Blacks: -4
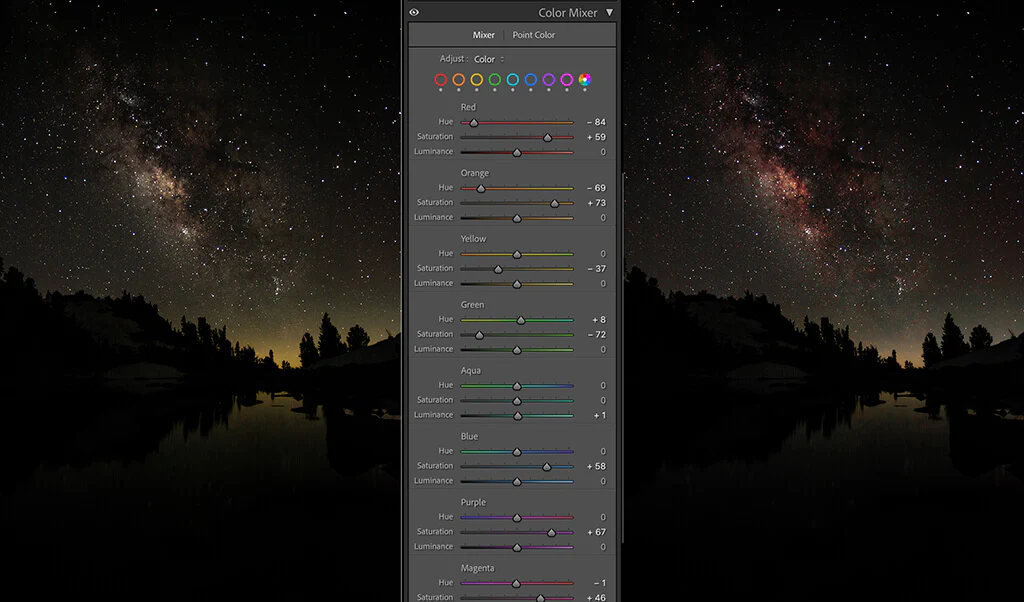
Step 3: Color Adjustments (The Fun Part!)
White Balance and Saturation:
- Slightly reduce overall saturation for more precise color control
- In the HSL panel, remove unwanted yellow/green tones and boost blues and purples
Color Grading: Use a Tetradic color scheme (4-color harmony) for balance:
- Shadows: Deep blue
- Midtones: Subtle magenta
- Highlights: Bright cyan
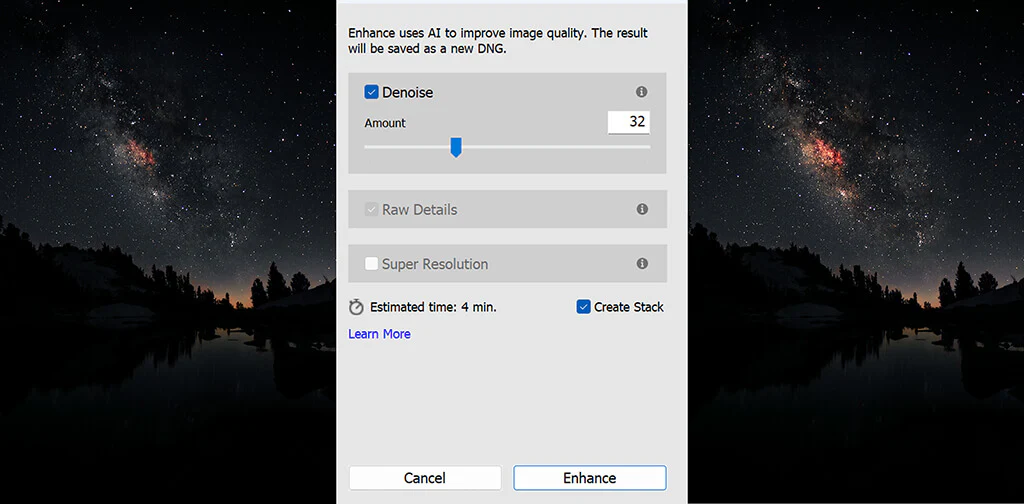
Step 4: Noise Reduction and Final Touches
AI Denoise (New Feature):
- Reduces digital noise while preserving detail (ideal for high-ISO shots)
- Adjust amount as needed (typically 30-50% works well)
Final Adjustments:
- Revisit Tone and Color panels to compensate for Denoise changes
- Fine-tune RGB curves for additional shadow contrast if needed
Final Result
From nearly black to a stunning star-filled image with depth and color! These adjustments are flexible – experiment with values based on your specific photo.
Recommended Presets: For quick edits, try presets like “Milky Way Enhancer” or “Astro Contrast Boost” (available in our Facebook group).
(Pro Tip: Always shoot RAW and use a tripod for maximum quality)
You’re now ready to transform your night sky photos into breathtaking works of art! 🌌✨