

How to Export Photos from Lightroom
After importing and editing your photos in Lightroom, the next crucial step is exporting them for printing, sharing via USB, or uploading to Facebook to attract potential clients.
Exporting is the process where Lightroom applies all your Develop module adjustments to create a new file (without altering the original, since Lightroom works non-destructively).
In this guide, we’ll walk you through exporting photos from Lightroom step by step, with clear explanations of each setting.
Note: For exporting from Lightroom Mobile, check out our separate tutorial.

Lightroom and Photoshop Facebook Group
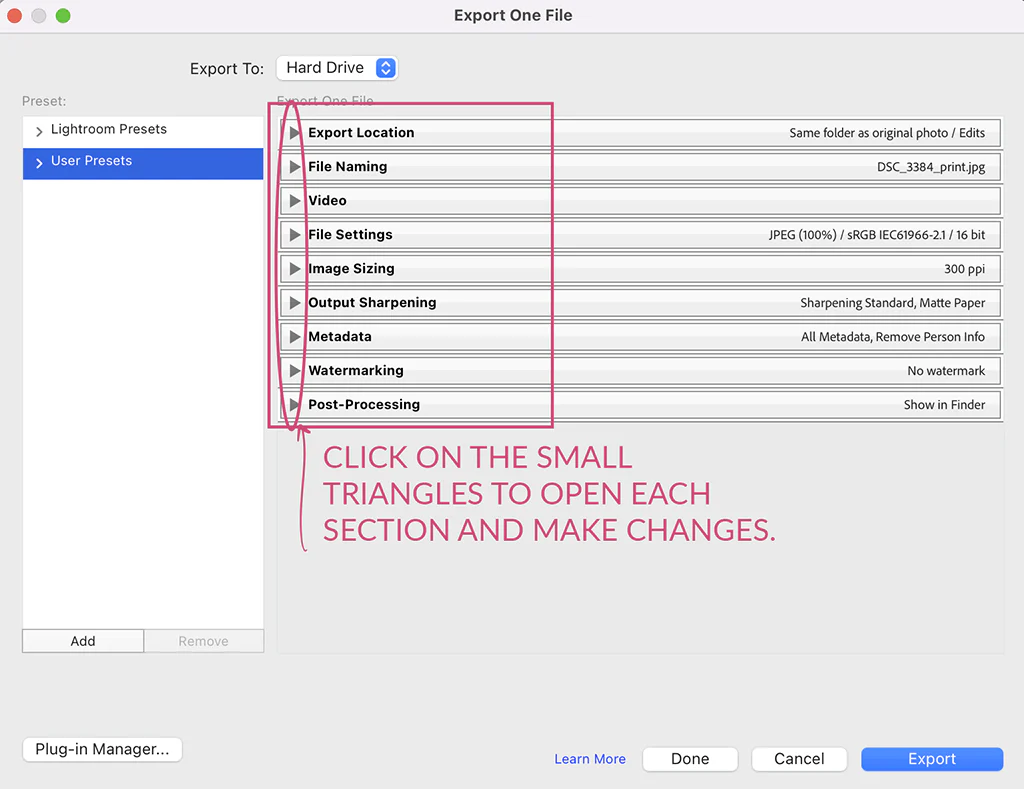
Step 1: Open the Export Dialog
There are 3 ways to open it:
- Right-click the photo > Export > Export
- File menu > Export
- Keyboard shortcut: Shift+Command (Mac) or Shift+Ctrl (Windows)
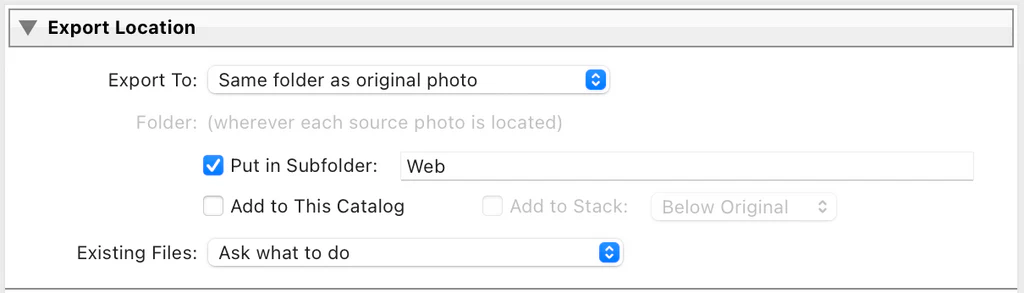
Step 2: Select Export Location
Under Export Location:
- Click “Choose” to select the destination folder
- Check “Put in Subfolder” to create a named subfolder
- We recommend creating specific folders like “Web” for online images or “Print” for prints
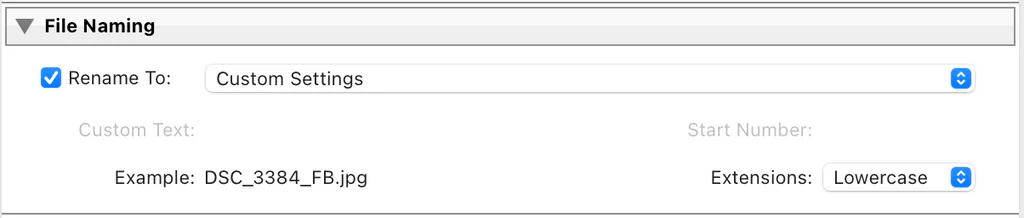
Step 3: File Naming
Under File Naming:
- Rename files as needed
- Add suffixes like “_web” or “_print” to identify their purpose
- Use Lightroom’s built-in naming templates for efficiency
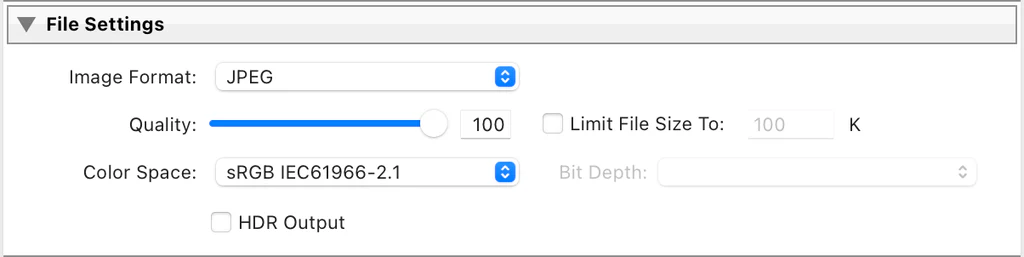
Step 4: Configure File Format
Under File Settings:
- Format: Choose between JPG, TIFF, PSD or others (if you shot RAW, export as JPG or TIFF)
- Color Space: sRGB for general/web use, Adobe RGB for high-quality prints
- Quality: Set to 100% for maximum quality
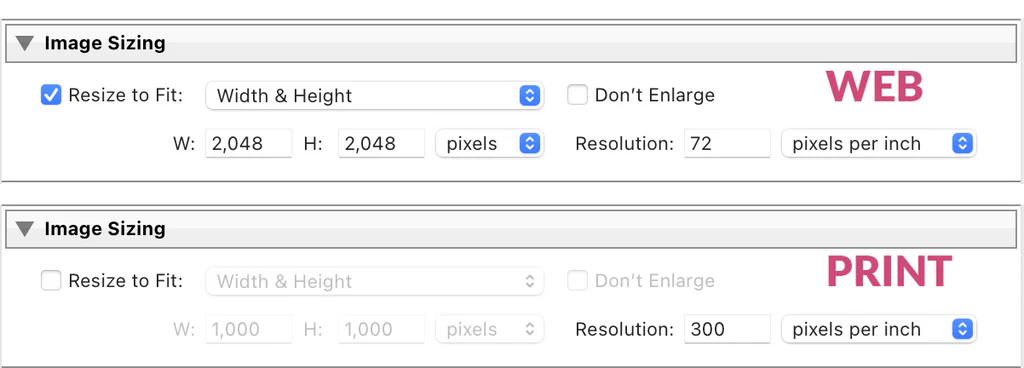
Step 5: Adjust Image Size
Under Image Sizing:
- For print: 300 DPI resolution and keep original size
- For web: 72 DPI resolution with maximum 2048 pixels on the long side (prevents Facebook compression)
Step 6: Output Sharpening
Under Output Sharpening:
- Web: Select “Screen” with “Low” intensity
- Print: Choose “Matte” or “Glossy” with “Standard” intensity

Step 7: Watermarking
Under Watermarking:
- Enable “Watermark” to add your mark
- Use preconfigured watermarks or create a new one

Step 8: Post-Export Actions
Under Post-Processing:
- Choose “Show in Finder/Explorer” to quickly access files
- Or open directly in Photoshop for further editing

Step 9: Click Export
Once everything is configured, click “Export” to complete the process.
Additional Tips:
- Save your settings as a preset for future use
- Always check exported photos to ensure quality
With these steps, you’ll be able to export your photos from Lightroom efficiently and professionally!
Pro Tip: For batch exporting multiple photos with the same settings, simply select all images before starting the export process. The same settings will apply to all selected photos, saving you significant time when processing large photoshoots.
Troubleshooting Note: If your exported images appear different from what you see in Lightroom, double-check your color space settings and ensure your monitor is properly calibrated for color-accurate results.
Creative Option: For advanced users, try experimenting with the “Add Copyright Metadata” option in the Export dialog to automatically embed your copyright information in every exported file.
Remember that Lightroom’s export process is completely reversible – your original files remain untouched in the catalog, so you can always re-export with different settings as needed. Happy exporting!