

How to Rename a Lightroom Catalog
Renaming your Lightroom catalog isn’t something you’ll do frequently, but it’s important to know how to do it properly when needed. This quick guide will walk you through the essential steps.
Important Warning: DO NOT rename catalog files while Lightroom is open.

Step 1: Locate Your Lightroom Catalog Folder
Before renaming, you need to find where your catalog files are stored (preferably with Lightroom closed).
- For Windows Users:
- Open Lightroom
- Click “Edit” in the top menu
- Select “Catalog Settings”
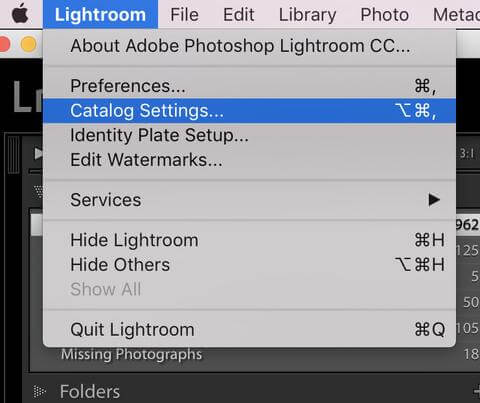
- For Mac Users:
- Open Lightroom
- Click “Lightroom” in the top corner of the screen
- Select “Catalog Settings”
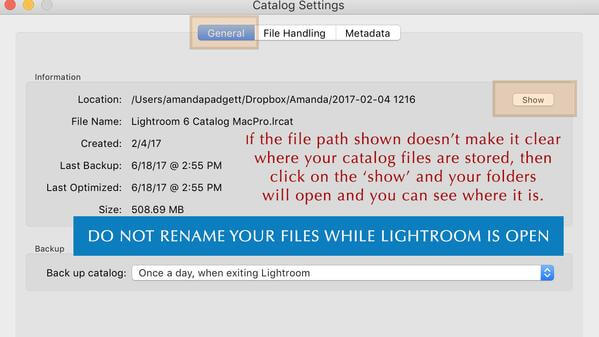
In the “General” tab, check the “Location” to find your catalog path. If you don’t see it, click “Show” to open the folder containing your catalog files.
Note: Use this method only to locate the files. DO NOT rename them while Lightroom is open.
Step 2: Close Lightroom
Very Important: If you opened Lightroom to locate the catalog, close it before proceeding. DO NOT rename files while Lightroom is running.
Step 3: Rename the Catalog Files
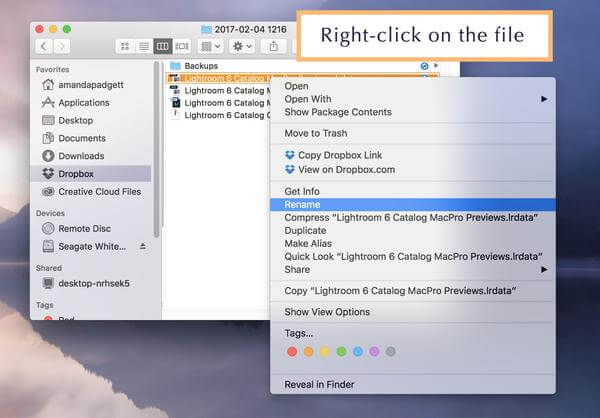
With Lightroom closed, you can rename these files:
Lightroom Catalog.lrcatLightroom Catalog Previews.lrdataLightroom Catalog Smart Previews.lrdata(if you don’t have this file, it means you’ve never created Smart Previews)
You can choose any names you prefer, but they must end with “Previews” and “Smart Previews” respectively, and the names must match.
Step 4: Reconnect the Renamed Catalog
When you open Lightroom after renaming, it won’t automatically find your catalog. Follow these steps:
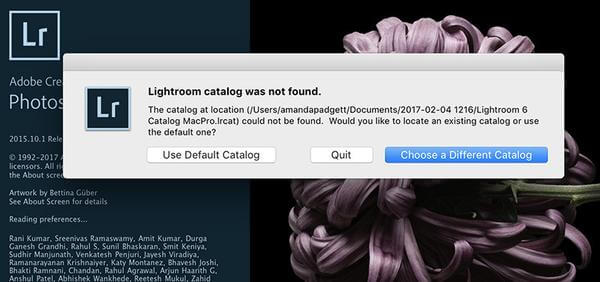
- Click “Choose a Different Catalog”
- In the next menu, click “Choose a Different Catalog” again
- A navigation window will open. Browse to your renamed catalog
- Once located, click “Select”
Tip: You can watch the video tutorial at the end of this article for a visual step-by-step guide.