

Optimize Your Photography Business: Top Tips & Tricks Streamline Your Photography Business: Professional Booking, Shooting, and Editing Tips
As a photographer, your time is your most valuable asset. In this article, I’ll share practical tips to optimize your workflow—from initial booking to final image editing.
By refining each step, you’ll save hours of administrative work and focus on what truly matters: capturing memorable moments for your clients.
Over the years, I’ve developed a system that transforms chaotic schedules into efficient processes. Let me walk you through a typical photoshoot and explore best practices to simplify your business and boost profits.

Let’s get started!
Lightroom and Photoshop Facebook Group
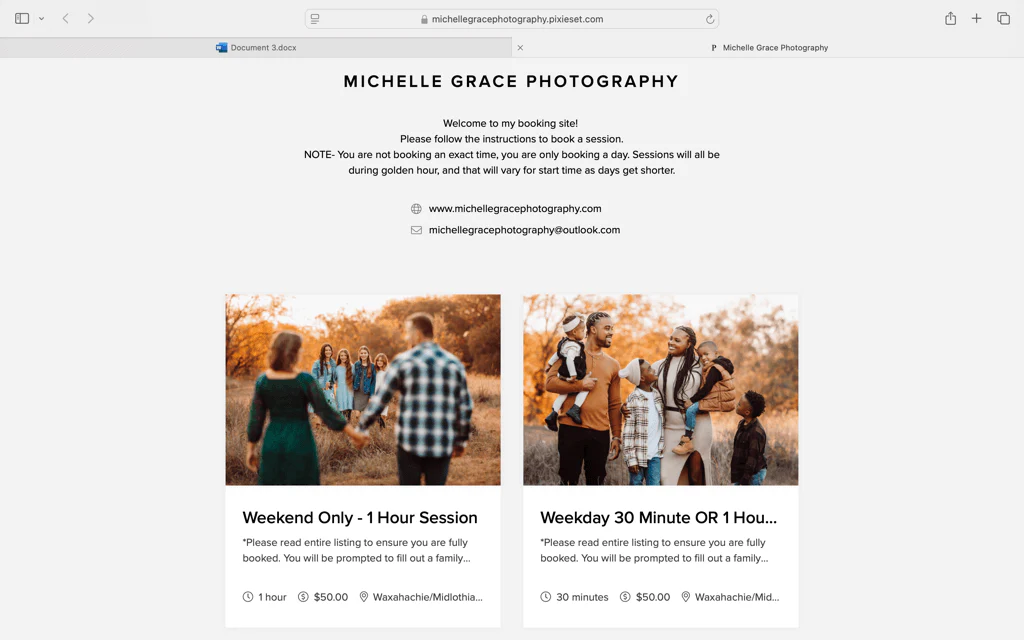
1. Client Booking
The first step in my workflow is client booking. When potential clients inquire about your services, respond promptly and effectively.
Initially, I spent hours crafting personalized replies for each inquiry. Eventually, I realized I was repeating the same information, so I started keeping categorized notes on my phone for different session types. This allows me to quickly copy-paste key details while still customizing responses.
In my initial email, I include a booking link that guides clients through:
- Selecting date/time
- Completing a questionnaire
- Signing the contract
- Submitting a deposit
Switching to a digital calendar was revolutionary. No more forgotten or double-booked appointments—everything stays organized and accurate.
2. Maintain Communication
After booking, strengthen the relationship by:
- Sending reminders a week before the shoot (start time, location, weather)
- Offering styling tips (color coordination, accessories, what to bring) These small touches build client confidence and excitement.
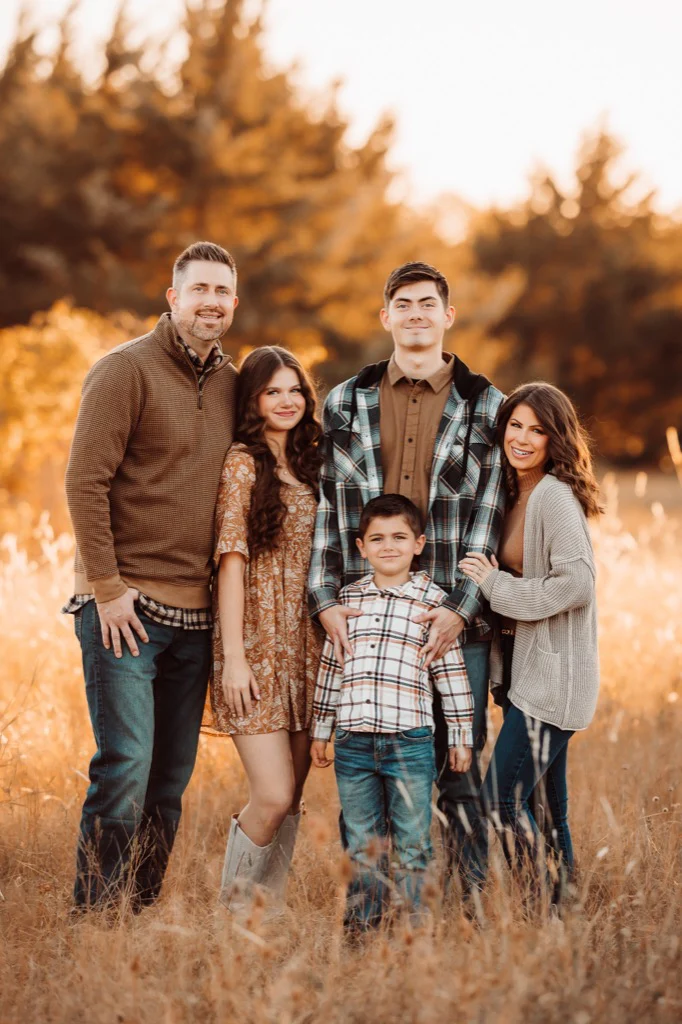
3. Shoot Day: Preparation for Perfection
On the big day:
- Review client emails and questionnaires
- Write family members’ names on my wrist (a foolproof connection trick!)
Session Flow Tips:
- Scout locations beforehand or arrive early
- Monitor lighting and time of day
- Double-check camera settings (ISO/aperture can accidentally change!)
- Keep a mental shot list but allow spontaneity
- Take one creative shot that reflects your personal style

4. Post-Shoot Organization
When I get home:
- Label and store SD cards in a transparent sleeve album with delivery dates noted
- Select the best shots into a “To Edit” folder
- Import to Lightroom Classic to begin creative processing Tools like Pretty Presets have helped me define my style while saving editing time.
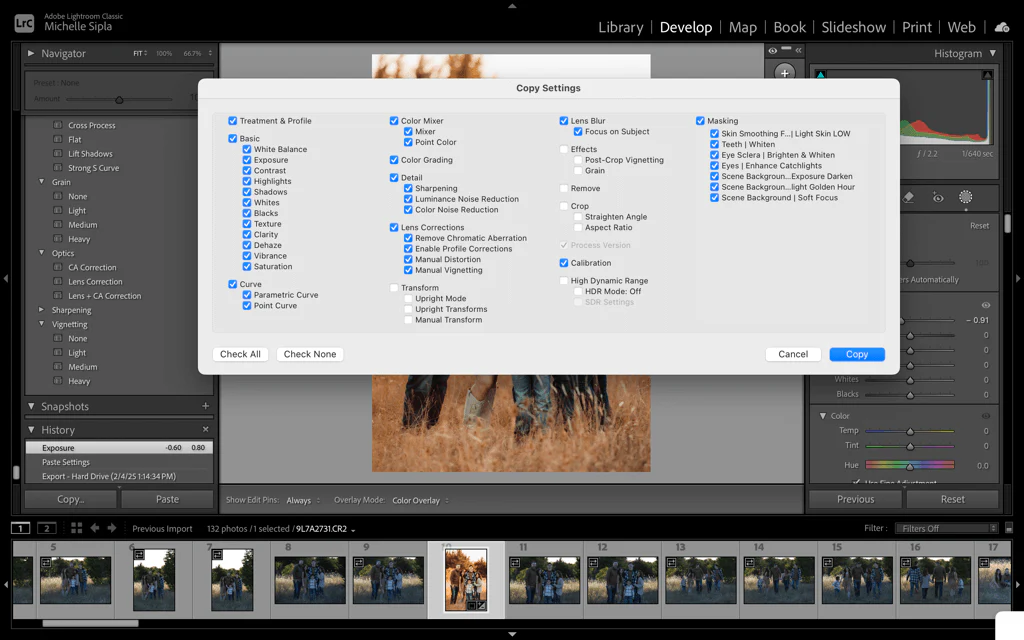
5. Efficient Lightroom Editing
My streamlined method:
- Apply a base preset (e.g., from the Wildheart collection)
- Adjust basics: exposure, contrast, white balance, colors
- Enhance with AI: skin smoothing, teeth whitening, etc.
- Copy settings and test on three sample images for consistency
- Batch edit and take a coffee break while processing
6. Final Touches & Delivery
Before delivery:
- Fine-tune white balance/remove distractions with Generative AI Remove
- Export both color and B&W versions for client versatility
- Upload the gallery and email the link
Streamlining is trial-and-error. For me, Pretty Presets has been essential for saving time while delivering beautiful, consistent results.
Conclusion
Thank you for joining this journey! I hope these tips help you work smarter—not harder. An optimized workflow means more time for what matters: creating images your clients will treasure forever.
Keep exploring new techniques and tools, and most importantly, enjoy the privilege of freezing fleeting moments for families to relive. Happy shooting on this beautiful photographic path!
This article: ✅ Maintains a professional yet friendly tone ✅ Includes practical, tested tips ✅ Highlights useful tools like Pretty Presets and Lightroom ✅ Presents a clear, efficient workflow ✅ Inspires photographers to optimize time and creativity

Perfect for photographers aiming to enhance productivity without compromising quality! 📸✨