

Overexposure vs Underexposure and How to Correct It Understanding Exposure in Photography
Achieving proper exposure is essential for creating beautiful photographs. Overexposed photos appear too bright, while underexposed ones look too dark. If you’re facing this issue, there are several techniques to prevent and correct it.
In this article, we’ll guide you through both in-camera adjustments and editing methods to ensure your photos have perfect exposure.
What is Exposure?
Before understanding overexposure and underexposure, we must first comprehend exposure itself. It refers to the amount of light that reaches your camera’s sensor or film to create an image.
You control exposure through three main settings:
- Aperture – The size of the lens opening
- Shutter Speed – The duration of light exposure
- ISO – The sensor’s light sensitivity
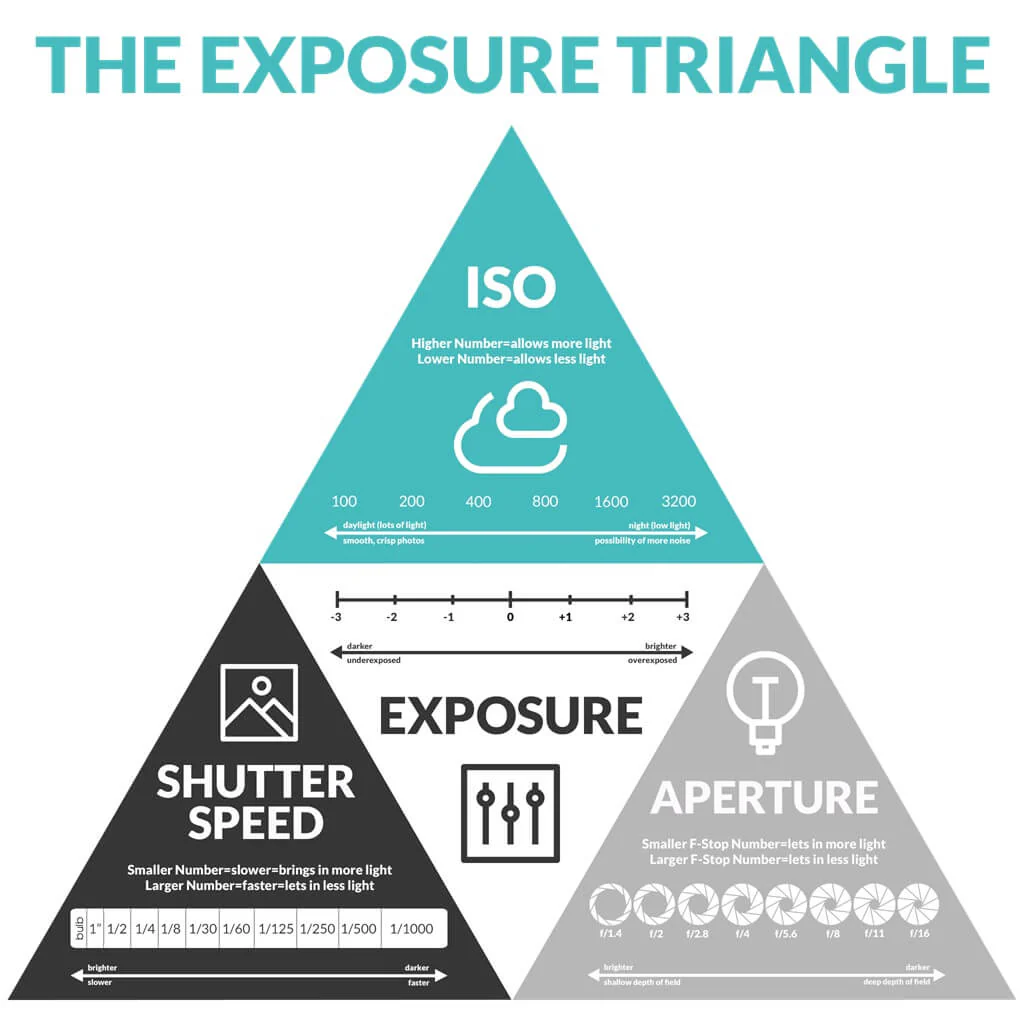
These three elements form the “Exposure Triangle.”
How to Determine Correct Exposure
The first step is to measure light accurately, typically using a light meter.
Most cameras have a built-in light meter displaying a scale from -2 to +2. The goal is to adjust settings until the indicator reaches the center (0).
However, the meter measures light reflected from your subject, which can sometimes lead to inaccurate readings and result in overexposed or underexposed photos.

Overexposure
Occurs when too much light reaches the sensor, making the image appear washed out with lost highlight details.
On the histogram, data clusters on the right side.
In-Camera Correction:
- Use a narrower aperture (higher f-number)
- Increase shutter speed
- Lower ISO to minimum
- Use ND filters to reduce light
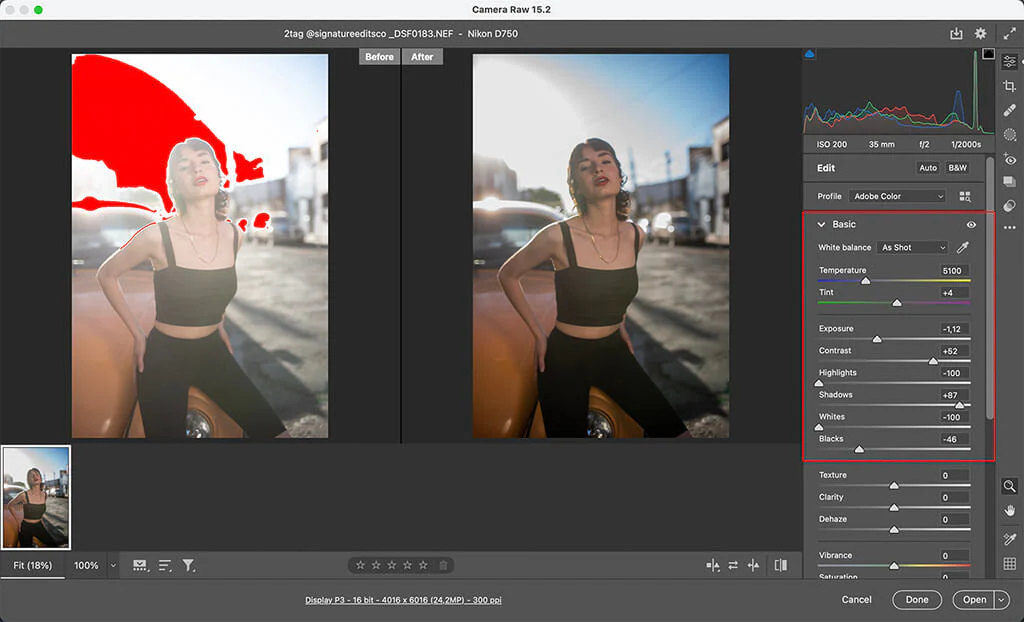
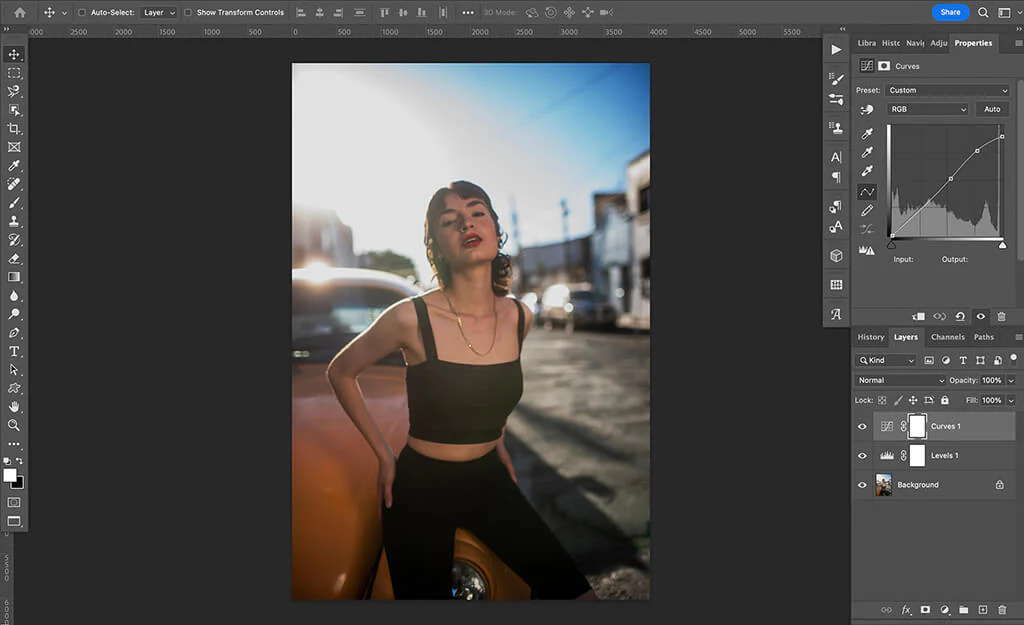
Editing Correction:
- Adjust exposure in Lightroom/Photoshop
- Reduce Whites and Highlights
- Use Curves and Levels tools
- Apply blending modes like Multiply
Underexposure
Happens when insufficient light reaches the sensor, resulting in dark images with lost shadow details.
On the histogram, data clusters on the left side.
In-Camera Correction:
- Use a wider aperture (lower f-number)
- Decrease shutter speed
- Increase ISO
- Use additional lighting or reflectors
Editing Correction:
- Increase exposure
- Adjust Shadows and Blacks
- Use Curves and Levels
- Apply blending modes like Screen
Additional Tips
- Shoot in RAW format for greater editing flexibility
- Use the histogram to check exposure while shooting
- Practice with your camera’s exposure compensation
Understanding and controlling exposure will help you create perfectly balanced, professional-looking photographs!